
Description
If you’ve never made homemade focaccia, prepare yourself—because this is the kind of bread that will ruin store-bought versions for you forever. It’s crispy, golden, salty, and unapologetically drenched in olive oil (in the best way). The edges are crunchy, the interior is light and pillowy, and the brine gives it an irresistible depth of flavor that makes each bite slightly crisp on the outside and perfectly chewy inside. Whether you eat it plain, dunk it in soup, or use it as the base for an absurdly good sandwich, this focaccia delivers on all fronts.
A few key things to know before you get started: weigh your ingredients (seriously, don’t ignore this step), embrace the overnight proof for the best flavor, and invest in a lidded baking sheet to make your life easier. The dough is sticky—it’s supposed to be—so don’t panic and start throwing in extra flour. And when you dimple the dough, don’t just poke at it gently—go all in. Your focaccia wants those deep craters to catch pools of olive oil.
This recipe is inspired by Claire Saffitz’s meticulous technique and Samin Nosrat’s and Giuseppe Dell’Anno’s genius brining/emulsion methods, and it strikes the perfect balance between crispy, fluffy, and deeply flavorful. Make it once, and you’ll wonder why baking homemade bread ever seemed scary.
Ingredients
- 3 cups room-temperature water (680 grams)
- 6 cups (780 grams) bread flour
- 2-1/4 teaspoons (7 grams) instant yeast
- 1 teaspoon (12 grams) granulated sugar
- 2 tablespoons (17 grams) Diamond Crystal kosher salt
- 1/2 cup (110 grams) good-quality extra-virgin olive oil, divided
EMULSION:
- 1/4 cup (55 grams) extra-virgin olive oil
- 1/4 cup (57 grams) warm water
- Flaky sea salt, for sprinkling
- Nonstick spray, for preparing the pan
Instructions
- In the bowl of a stand mixer fitted with the dough hook, combine 3 cups (680 grams) room temperature water, 6 cups (780 grams) bread flour, 2-1/4 teaspoons (7 grams) instant yeast, 1 teaspoon (12 grams) granulated sugar, and 2 tablespoons (17 grams) Diamond Crystal kosher salt. Mix on low until a loose dough forms, then raise the speed to medium-high and mix until the dough begins to look mostly smooth (there will be a few rough patches still) and wraps around the dough hook, about 5 minutes. Turn off the mixer, cover the dough with a damp towel, and rest the dough for 15 minutes.
- Return the mixer to medium-high speed and mix the dough until smooth, extremely sticky and elastic, and pulling away from the sides of the bowl; this could take anywhere from 15–20 minutes. You may have to give your mixer a break for a few minutes every 5 minutes or so; if you need to do this, re-cover the dough with the damp cloth to prevent it from drying out. Scrape the bowl and dough hook down as needed. To test the strength of the dough, remove the dough hook from the mixer and use it to pull the dough up in the air; it should stretch for some length before breaking (or it may not break at all). Don’t be tempted to add more flour!
- Pour 1/4 cup (55 grams) extra-virgin olive oil into a large mixing bowl; ensure it coats the bottom and sides. Scrape or pour the dough into the prepared bowl. Spread some of the pooling oil onto the top of the dough to coat. Cover with plastic wrap and let sit at room temperature until doubled in size, about 1 to 1-1/2 hours.
- Spray a half-sheet pan with a lid (I use the high-sided ones, but a regular sheet pan is okay, too) with nonstick cooking spray, being sure to lightly coat the pan completely. This will help prevent the focaccia from sticking, which it has a tendency to do when it bakes. Drizzle another 1/4 cup (55 grams) extra-virgin olive oil into the pan, coating the entire bottom and sides.
- Loosen the dough from the sides of the bowl with oiled hands. Slide your hands under each side of the dough and lift it out of the bowl, letting its weight pull it back downward into the bowl and fold over itself. Turn the bowl 90 degrees and repeat this same stretch and fold into the mixing bowl two more times. Perform one last stretch and fold (for a total of 4), landing the dough on the oiled sheet pan instead of the mixing bowl. Cover, and let the dough rest for 10 minutes, then begin stretching it in all directions to fill out the sheet pan. Once the dough starts to spring back/becomes harder to stretch, cover again and let rest for 15 minutes. Return to the dough and stretch to fill the sides and corners to completely cover the pan. Take care not to thin the dough too much in one area or create holes in the dough. Cover, and let sit for 15 minutes more. Transfer to the refrigerator and let proof slowly for approximately 24 hours.
- The next day, remove the dough from the refrigerator. It will likely not have doubled in size; allow to sit at room temperature to remove the chill and continue proofing until puffy and doubled in size; this could take up to 2 hours.
- Arrange one oven rack in the lowest position; if you have a baking stone or steel, place it on this rack. Position another oven rack 8 inches from the top. Preheat the oven to 450°.
- Prepare the brine: In a small, lidded container, combine 1/4 cup (55 grams) extra-virgin olive oil and 1/4 cup (57 grams) warm water; shake vigorously to combine.
- When the dough is proofed, uncover and use oiled fingertips to dimple the dough all over, taking care not to poke all the way through. Pour the prepared brine all over the top of the dough, then sprinkle fairly generously with flaky sea salt.
- Bake the focaccia on the lowest rack (setting the pan on top of the baking stone/steel if you’re using it) until the dough is beginning to turn golden and pulling away from the sides of the pan, about 20–25 minutes. Move the focaccia to the top rack and continue baking until very golden-brown (a little charring is okay, especially on any big bubbles), about 5–10 minutes more.
- Let the focaccia cool in the pan for 10 minutes, then run a thin spatula (like a fish spatula) around the sides and bottom to loosen it. If anything sticks, just wiggle the spatula gently to help release it. Transfer the focaccia to a cooling rack to continue cooling. It’s best eaten fresh and slightly warm, but don’t cut into it while it’s too hot or you’ll lose some of the moisture.
Equipment
 Buy Now →
  Buy Now →
  Buy Now →
  Buy Now →
  Buy Now →
  Buy Now →
 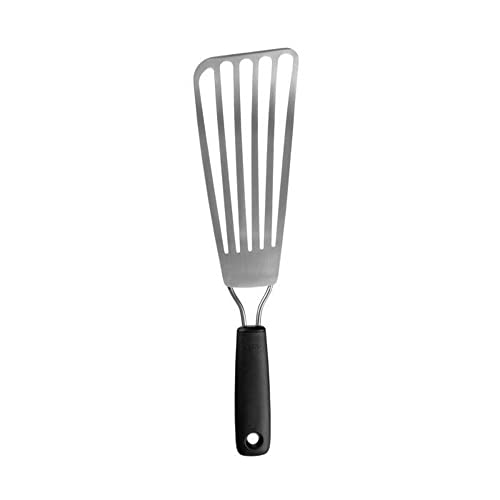 Buy Now →
  Buy Now →
  Buy Now →
  Buy Now →
 Notes
One key thing to note: The measurement of kosher salt given in the recipe is strictly for Diamond Crystal kosher salt, my go-to. You absolutely cannot use salts interchangeably or your risk under- or over-seasoning your dish. Here is a handy guide on converting salt measurements depending on what variety you’re using.
You can top focaccia with a massive variety of things, from tomatoes and olives to herbs and onions to cheese. Once you’ve mastered the classic recipe, play around with toppings to create something truly your own!
Inspiration: Soft and Crispy Focaccia, Dessert Person by Claire Saffitz; Ligurian Focaccia by Samin Nosrat; Focaccia Genovese, Giuseppe’s Italian Bakes by Giuseppe Dell’Anno
- Category: Bread-y Things, Breads, Italian-Inspired