• Bloglovin
  • Facebook
  • Instagram
  • Pinterest
  • Twitter
  • Skip to primary navigation
  • Skip to main content
  • Skip to primary sidebar
  • Skip to footer

Never Not Hungry logo

  • Recipes
  • Wanderlust
    • Europe
  • Inspiration
    • The Magic of Books
      • Monthly Book Bag
      • Cookbook Clique
  • Shop
  • Crumbs, Nibbles, Sips & Sprinkles
    • Obsessed
      • Gift & Lifestyle Guides
    • Resources
    • On Sundays We Brunch
  • About
    • Work With Me
    • Contact
    • Le Bon Fond Cooking School
  • Newsletter Subscription

Seven-Layer Taco Dip

[heart_this] · Jul 2, 2024 · Leave a Comment

Disclosure: This post contains affiliate links. As an Amazon Associate, I earn from qualifying purchases. This means if you click on any Amazon links on my website and make a purchase, I may receive a commission at no additional cost to you. It’s a great way to support my blog, so I can keep sharing delicious recipes with you!

Jump to Recipe·Print Recipe

Get ready to wow your guests this summer with the ultimate Seven-Layer Taco Dip! Perfect for your upcoming Fourth of July parties, this mouthwatering dip layers creamy, spicy, and fresh flavors that will have everyone coming back for more. Inspired by my mom’s recipe, each bite is a nostalgic trip down memory lane—for me, at least. Say goodbye to boring appetizers and hello to the star of your summer celebrations!

I am a dip girl through and through—I will, and often do, make meals out of dips. I think you should, too. Start with this one!

The History of Seven-Layer Dip: A Classic Party Staple

If you’ve ever been to a potluck or a family gathering in the last few decades, chances are you’ve encountered the legendary seven-layer dip. This iconic dish, hailing from the heart of Tex-Mex cuisine, has graced tables across America, bringing joy and satisfaction with every scoop. But where did this beloved dish originate? Spoiler alert: it wasn’t handed down from ancient Aztec culinary traditions.

Seven-layer dip first made waves in the 1980s, riding the wave of Tex-Mex popularity in the United States. Its charm lies in its simplicity and the tantalizing layers of flavors and textures. Traditionally, this dip is a symphony of refried beans, guacamole, sour cream, salsa, cheese, tomatoes, and olives. Each layer adds its own unique contribution to the overall taste experience, making it a hit at parties and gatherings. Word on the street is they assemble this on a serving platter down in Texas for a better dipping experience. I’m not opposed, but it was always served in a glass Pyrex at my house, so we’re sticking to that this time. You do you.

 What’s Traditionally in a Seven-Layer Dip?

The classic seven-layer dip is a often a simple affair, yet full of flavor. Here’s a quick rundown of what you’ll typically find in each layer:

  1. Refried Beans: The hearty base, providing a rich and savory foundation.
  2. Guacamole: Creamy, fresh, and full of zesty lime flavor.
  3. Sour Cream: Adds a tangy, cooling contrast to the spicier layers. It often has taco seasoning to jazz it up.
  4. Salsa: A chunky, tomato-based layer that brings a burst of freshness.
  5. Cheese: Usually a shredded Mexican or cheddar Jack blend.
  6. Tomatoes: Diced and juicy, adding a bright pop of color and flavor.
  7. Olives: Sliced black olives for a salty, briny finish.

Now, let’s dive into my take on this classic, heavily inspired by my mom’s taco dip that was a staple at our family gatherings.

My Mom’s Seven-Layer Taco Dip: The Ultimate Crowd-Pleaser

Ah, nostalgia. There’s nothing quite like a dish that takes you back to your childhood, and for me, that’s my mom’s seven-layer taco dip. I used to smash half of this for a meal as a kid, though not much has changed if this is in the fridge. A couple major differences between my version and my mom’s: 1) She didn’t put guacamole in this when I was growing up because avocados weren’t as widely available and guac just wasn’t a thing in my Iowa hometown. I didn’t have an avocado until I was in college (GASP!). It’s still shocking to say this 20 years after the fact. 2) My mom (and many others) put a layer of shredded iceberg in hers, but I am categorically and vehemently opposed to this. I absolutely hate how soggy the lettuce gets over time, and iceberg isn’t something I go out of my way for anyway. I lost my taste for a year and a half during Covid, and iceberg and romaine absolutely tasted awful to me when I could start tasting again. They still don’t taste like they used to, and I still steer clear of them when possible.

Here’s how you can recreate this seven-layer dip in your own kitchen.

Ingredients Overview

  • Layer One: Cream cheese and sour cream base with ground cumin, coriander, garlic and onion powders, chili powder, elote seasoning, and lime juice. I skip the taco seasoning for this mix instead and often combine several single-chili powders, like guajillo, ancho, chipotle, pasilla, or New Mexico, to create my own taco-ish chili seasoning. This creamy concoction sets the stage for the flavors to come. Cream cheese is not traditional, but this is how my mom made it, and I think it makes for a sturdier, more flavorful layer than just sour cream. You absolutely must taste for seasonings before assembling the dip any further and adjust any and all flavorings to your liking.
  • Layer Two: Homemade refried beans. Trust me, go homemade if you can. It’s worth the extra effort for that authentic, rich taste. Store-bought will get the job done if need be.
  • Layer Three: Guacamole. You can buy it pre-made if you’re short on time, but fresh guac will always reign supreme.
  • Layer Four: Chunky salsa. The key here is to drain it well. No one likes a watery dip.
  • Layer Five: A mix of diced Roma tomatoes and finely sliced scallion whites. Fresh, crisp, and full of flavor.
  • Layer Six: Finely shredded Mexican-blend cheese. I literally will never call for this again, but the pre-shredded stuff is best here. Shredded cheese has a tendency to clump as it warms when you’re shredding it and assembling the dip, which is not ideal.
  • Layer Seven: The final touch of sliced green onion tops, picked cilantro leaves, and a sprinkling of elote seasoning and chili powder. I’m partial to Trader Joe’s elote seasoning, but if you don’t live close to a TJ’s, you can order other versions online. Optional pickled jalapeño slices for those who like a bit of heat. You can also bring sliced olives into the equation, though I never will (I know, I know—I’m really trying to make myself like olives. I’m too old and too obsessed with food to have an olive aversion).

Tools & Equipment

  • 8 x 8-inch glass baking dish
  • Hand mixer
  • Metal mixing bowls
  • Small offset spatula
  • Chef’s knife
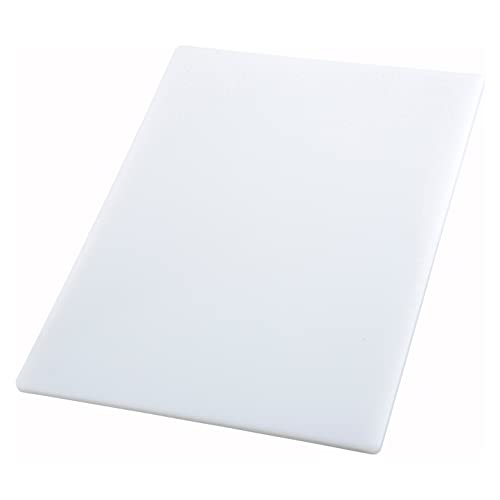
  • Plastic cutting board
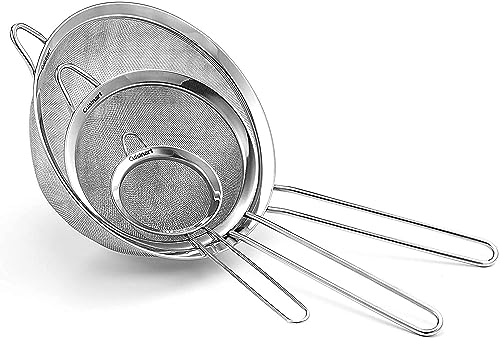
  • Fine-mesh strainer

Technique & Tips

  1. Layering Order is Crucial: Start with the cream cheese mixture as the base to support the heavier layers above. This helps keep each layer distinct and prevents a muddled mess. Also, this is how my mom did it, so you’ll never convince me to start with anything else.
  2. Draining the Salsa: This step is non-negotiable. Use a fine-mesh sieve to drain most of the liquid from the salsa to avoid a soggy dip.
  3. Assembly: Spread each layer carefully. Dolloping the guacamole and beans and then spreading them gently helps maintain the integrity of the layers.
  4. Chill Before Serving: Let the assembled dip sit in the refrigerator for 2-3 hours. This allows the flavors to meld together and the ingredients to firm up just enough. Take it out of the fridge about 30 minutes before you want to serve.

Imagine the moment you dip your chip into this seven-layer wonder. The crunch of the tortilla chip meets the creamy, tangy base layer, followed by the savory beans, rich guacamole, and the burst of fresh salsa. The juicy tomatoes and crisp scallions add a delightful texture, while the cheese and final toppings tie everything together with a perfect balance of flavors and heat. It’s a sensory overload in the best possible way.

Seven-layer taco dip is more than just an appetizer; it’s a journey through layers of taste and texture that brings people together around a bowl of chips and a party dip. Whether you’re making it for a casual get-together or a special occasion, this recipe is sure to satisfy. Just remember, the key to a perfect dip is in the details: the layering, the draining, and the quality of your ingredients.

So, grab your favorite tortilla chips, gather your favorite people, and dive into one of my mom’s best recipes. Trust me, once you’ve tried this version, you’ll never look at seven-layer dip the same way again. Happy cooking!

Print
clock clock iconcutlery cutlery iconflag flag iconfolder folder iconinstagram instagram iconpinterest pinterest iconfacebook facebook iconprint print iconsquares squares iconheart heart iconheart solid heart solid icon

Seven-Layer Taco Dip


5 Stars 4 Stars 3 Stars 2 Stars 1 Star

No reviews

  • Author: Amanda
  • Yield: 10 to 12 servings 1x
Print Recipe
Pin Recipe

Description

Discover the ultimate Seven-Layer Taco Dip with this nostalgic recipe. Perfect for any gathering, this dip layers creamy, spicy, and fresh flavors for a truly addictive party dip.


Ingredients

Scale

LAYER ONE:

  • 8 ounces cream cheese, at room temperature
  • 3/4 cup (6 ounces) sour cream, at room temperature
  • 2 teaspoons ground cumin
  • 1 teaspoon ground coriander
  • 1/2 teaspoon garlic powder
  • 1/2 teaspoon onion powder
  • 1 tablespoon + 1 teaspoon chili powder (a store-bought mix or combine some of your favorite single-chili powders)
  • 1 tablespoon + 1 teaspoon elote seasoning
  • Juice of 1 lime
  • Kosher salt and freshly ground black pepper, to taste

LAYER TWO:

  • 1–1/3 cups refried beans, preferably homemade

LAYER THREE:

  • 1–1/3 cups guacamole, store-bought or homemade

LAYER FOUR:

  • 16 ounces chunky salsa, drained in a fine-mesh sieve of most of its liquid

LAYER FIVE:

  • 2 Roma tomatoes, seeded, diced, and seasoned with salt to taste
  • 5 scallions, finely sliced, white parts only (save the green tops for layer seven)

LAYER SIX:

  • 5.5 ounces finely shredded Mexican-blend cheese (pre-shredded store-bought is preferred)

LAYER SEVEN:

  • Sliced green tops from 5 scallions
  • 1/4 cup picked cilantro leaves
  • Elote seasoning and chili powder, for sprinkling on top
  • Pickled jalapeño slices, optional
  • Tortilla chips, for serving

Instructions

  1. For layer one: Combine all ingredients until fully homogenous using a hand mixer. Taste for seasonings and adjust as necessary.
  2. To assemble: In an 8 x 8-inch baking dish, spread the cream cheese layer (1) over as the base. Spread the refried bean layer (2), then the guacamole (3) over top. You may need to dollop these layers and spread from there to avoid disrupting the layers beneath each time. Spread the salsa (4) over the guacamole layer. Sprinkle the tomatoes and scallion whites (5) over the salsa layer. Sprinkle the cheese (6) to completely cover the layers beneath. Scatter the green onion tops and picked cilantro leaves (7) over the cheese. Cover and transfer to the refrigerator for 2–3 hours before serving.
  3. Remove the dip from the refrigerator about 30 minutes before you want to serve it. When you’re ready to serve, sprinkle with as much elote seasoning and chili powder as desired*. Serve with pickled jalapeño slices on top or on the side if the crowd you’re serving this to doesn’t veer toward spicy.

Equipment

Image of 8 x 8-inch glass baking dish

8 x 8-inch glass baking dish

Buy Now →
Image of chef's knife

chef’s knife

Buy Now →

elote seasoning

Buy Now →
Image of fine-mesh strainer

fine-mesh strainer

Buy Now →
Image of hand mixer

hand mixer

Buy Now →
Image of metal mixing bowls

metal mixing bowls

Buy Now →
Image of plastic cutting board

plastic cutting board

Buy Now →
Image of small offset spatula

small offset spatula

Buy Now →

Notes

*I’ve noticed these spices can start to absorb moisture from your dip/the fridge if they’re put on earlier, but you can absolutely still sprinkle these on when you’re initially assembling if you want to fully complete the recipe before chilling or are transporting this and don’t want to take the elote and chili powders with you.

  • Category: Appetizers, Dips

Did you make this recipe?

Tag @iamnevernothungry on Instagram and hashtag it #nevernothungry


Related

Share
Pin2
Tweet
Yum
Email
2 Shares

Recipe Appetizers, Dips

Reader Interactions

Leave a ReplyCancel reply

Primary Sidebar

  • Bloglovin
  • Facebook
  • Instagram
  • Pinterest
  • Twitter

ABOUT ME

Hi. I’m Amanda. I love food, cooking, sharing it with others and documenting it. I’m a little of this and little of that-taste while you go type of cook.  I found a true passion over the years when I really began to understand how deeply connected food and love are.

Learn More

FAVORITE BLOGS

Pinch of Yum

How Sweet Eats

Smitten Kitchen

Broma Bakery

FoodieCrush

Spoon Fork Bacon

A Cozy Kitchen

What’s Gaby Cooking

Wood & Spoon

Footer

Privacy & Cookies: This site uses cookies. By continuing to use this website, you agree to their use.
To find out more, including how to control cookies, see here: Cookie Policy

Receive New Posts in Your E-mail!

Enter your email address to follow this blog and receive notifications of all new content by email.

What’s happening on Instagram

iamnevernothungry

I love good food.

If you think stuffed mushrooms are a relic of 1970 If you think stuffed mushrooms are a relic of 1970s dinner parties, let me introduce you to the glow-up you didn’t know you needed. These Manchego-Stuffed Mushrooms with Chorizo Breadcrumbs are rich, crispy, and dangerously poppable—so much so that you might accidentally eat an entire tray while “taste-testing.” (Not speaking from experience. Definitely not.)

They’re easy enough for a casual get-together but fancy enough to pretend you have your life together. Perfect for parties, holidays, or a Tuesday night when you need a snack that’s extra.

Get the full recipe on the blog! Link in bio.

#StuffedMushrooms #EasyEntertaining #SavorySnacks #Appetizers#nevernothungry
Sunday Funday anyone? Enter: the Paper Plane. Bour Sunday Funday anyone? Enter: the Paper Plane. Bourbon, Aperol, Amaro Nonino, and lemon—equal parts, no fuss, all reward. 🍹✈️ #SundayFunday #Cocktails
This Roasted Cipollini Onion Torta with Pecorino F This Roasted Cipollini Onion Torta with Pecorino Fonduta is a showstopper that combines rich, caramelized cipollini onions with a buttery, Pecorino-infused crust and creamy fonduta made with Pecorino and Taleggio. Perfect for a special dinner or impressing guests, this dish is packed with layers of deep, savory flavors and satisfying textures. While it’s not quick or cheap, the effort is absolutely worth it—each bite is a melt-in-your-mouth experience of sweet onions, creamy cheese, and a flaky crust. Perfect for food lovers who appreciate the magic of slow-roasted onions and decadent, cheesy indulgence.

#Food #Recipe #DinnerParty #ImpressYourGuests #Foodstagram #ItalianFood #RusticCooking #SavoryPie #IndulgentEats #FromScratch #NeverNotHungry
Elevate your Valentine’s Day with this stunning Elevate your Valentine’s Day with this stunning Red Wine-Poached Pear and Blue Cheese Salad—no prix fixe menu required. Sweet, salty, crunchy, and creamy—it’s a showstopping salad that’s easy to prep ahead!

Sweet, tender pears, creamy blue cheese, crispy pancetta, and crunchy walnuts come together in the perfect balance of flavors and textures. It’s elegant but easy, special but not fussy—just how a great meal (and date) should be.

Pour a glass of wine, plate up something delicious, and enjoy. ❤️

Recipe linked in bio!

 #ValentinesDayDinner #RedWineAndDine #WeeknightGourmet
January salads are all about ‘new year, new me,’ but let’s be real—no one said that ‘me’ had to skip crispy potatoes or steak. 

This Crispy Potato & Balsamic Steak Salad with Creamy Boursin Dressing is the perfect balance of ‘I’m trying’ and ‘treat yourself.’ Because life’s too short for sad salads—and bad food in general. Link in bio for the recipe! 

#NeverNotHungry #SaladGoals #DinnerSalad #Recipe #Healthyish
Looking for an easy, crowd-pleasing recipe that fe Looking for an easy, crowd-pleasing recipe that feels fresh and light despite being a massive sandwich? Enter the Green Goddess Turkey Party Sandwich—a layered masterpiece that’s as simple to make as it is impressive to serve. With a zesty, herb-packed green goddess sauce, marinated zucchini ribbons, and fresh, crunchy, mostly green veggies, every bite bursts with flavor and texture. 

Don’t let its size fool you—this sandwich tastes incredibly fresh, thanks to bright, seasonal ingredients that keep things light while still delivering on all the comforting, hearty vibes we love in a good sandwich. Perfect for a quick lunch or to serve a crowd for game day!

#GreenGoddess #PartySandwich #EasyRecipes #FreshAndLight #CrowdPleaser #LunchIdeas #GameDayFood #QuickMeals # #Foodstagram #InstaFood #FoodInspiration #FoodPhotography #HomeCookedMeals #ComfortFood
I know what you’re thinking: squash blossoms in I know what you’re thinking: squash blossoms in late September? Am I out of my mind? Maybe. But hear me out. I found the best-looking squash blossoms I’ve ever come across at the farmer’s market on Saturday, and they were $5 for 3 big bunches and the sweet corn stand was still going on the corner, so you can’t expect me to pass that up. I’ve been waiting to recreate a dish I had at @monteverdechi in Chicago last month, so here we are…with a recipe…for squash blossoms…with sweet corn…in almost October.

I get it—it’s technically the end of squash blossom season, but if you’re lucky, you might still find a stash at your local farmers’ market or, dare I say it, a friendly neighbor’s garden (or your own?). Either way, if you can track some down, these Crab and Ricotta-Stuffed Squash Blossoms are worth the hunt. Trust me, you’ll want to savor every last bite of this seasonal gem. I can easily take down five or six of these.

#Food #Recipe #Seafood #SquashBlossoms #SummerRecipes #SummerFood #Seasonal #Crab #Instafood #Foodstagram #NeverNotHungry
Lettuce wraps are one of those dishes that sound s Lettuce wraps are one of those dishes that sound simple, but when done right, they pack a punch of flavor that’ll leave you wondering why you don’t make them more often. These Spicy Coconut Chicken Lettuce Wraps are no exception. Sure, they’ve got a few more ingredients than the quick weeknight dinner you might be looking for, but trust me, the payoff is huge. With layers of spicy green curry, creamy coconut, tangy pickled veggies, and two ridiculously good sauces, these wraps are a sensory experience in every bite. Whether you’re a fan of the lettuce wraps at P.F. Chang’s or you’ve fallen in love with the spicy, herb-packed flavors of Thai larb, this recipe is going to blow your mind (in the best way possible). 

Plus, if you’re feeling overwhelmed by the ingredient list, I’ve got tips on how to split this into a two-day cooking adventure—because let’s be real, no one wants to spend five hours in the kitchen on a weekday.

#Food #Recipe #NeverNotHungry #Chicken #Foodstagram #Instafood
Let’s talk s’mores—the ultimate campfire tre Let’s talk s’mores—the ultimate campfire treat: graham crackers, chocolate, and marshmallows, perfectly toasted over an open flame, leaving your fingers sticky and your soul satisfied. But, sometimes, the outdoors isn’t calling or you want to make them on a larger scale, and making a bonfire in your kitchen is frowned upon. That’s where these S’mores Bars with Toasted Marshmallow Meringue come in. They’re a modern twist on a campfire classic. They’re a perfect make-ahead dessert for parties, tailgates, and bake sales.

We’re taking all the nostalgic flavors of your childhood camping trips and leveling them up—big time. These bars start with a buttery graham cracker crust, are layered with fudgy brownie goodness, topped with rich chocolate ganache, and finished with a cloud of toasted marshmallow meringue. And the best part? You can enjoy these babies without having to swat away a single mosquito. No joke—last time I had a bonfire and made s’mores, my cousin and I came away with over 50 mosquito bites collectively.

#Food #Recipe #Smores #CampfireTreats #DessertLovers #SweetTooth #ChocolateLovers #TailgateSnacks #BakeSaleFavorites #DessertInspo #Foodstagram #BakersOfInstagram #SmorePlease #GooeyGoodness #NostalgicFlavors #PartyDesserts #CampingVibes #SweetTreats #HomeBaking #BakingGoals #nevernothungry
Looking to take your burger game to the next level Looking to take your burger game to the next level? The Monterey Melt Smash Burger is about to blow your taste buds away. This isn’t just your average burger—it’s a flavor-packed experience with crispy, caramelized beef, beer-braised vegetables, and a smoky jalapeño-cilantro ranch that you’ll want to put on everything. We’re talking double layers of melty cheese, a rich beer-mustard glaze, and that perfect smash burger texture. Whether you’re cooking for a crowd or treating yourself to a next-level meal, this burger brings big flavors and textures with every bite. This is the best burger I’ve ever made.

#Food #Recipe #Burgers #BurgerNight #Grilling #Smashburgers #SummerRecipes #NeverNotHungry #Instafood #Foodstagram
Have guests coming over and need to impress withou Have guests coming over and need to impress without resorting to the old standby recipes? Spicy Lobster Pasta with Sungold Tomato Sauce is the kind of dish that says, “I went all out for you”—because, let’s be real, lobster isn’t exactly a budget-friendly ingredient. But when company’s coming, it’s time to pull out the stops. This pasta is decadent, rich, and bursting with fresh summer flavors, thanks to sweet Sungold tomatoes and a luxurious mascarpone-laden sauce. It’s a little spicy, a lot indulgent, and just the thing to make your guests feel like they’re dining at a five-star restaurant—without anyone realizing you’re secretly glad to have an excuse to splurge.

It’s rich, flavorful, and just the right amount of spicy. Plus, there’s a Sungold tomato sauce so smooth it’s like silk wrapped around every strand of pasta. Forget reservations—this is dinner with a serious wow factor, and you didn’t even have to leave your house.

#Tomatoes #PastaLovers #GourmetAtHome #LobsterPasta #DecadentDishes #ImpressYourGuests #SummerFlavors #FoodieInspo #FiveStarMeals #DinnerPartyIdeas #PastaPerfection #SeafoodLovers #ComfortFood #FancyFood #Lobster #Recipe #nevernothungry
When it comes to dessert, I think that combining f When it comes to dessert, I think that combining fruit with a crispy, buttery topping and serving with vanilla ice cream is one of the most satisfying ways to enjoy the season’s best produce. But let’s be real, there’s always room for improvement. Enter: Salted Caramel Peach Crisp. The salty-sweet, slightly bitter caramel plays off the peaches so well. This dish is the perfect marriage of sweet, juicy peaches and a rich, salty caramel sauce, all crowned with a crisp topping that’s just begging to be devoured.

#Food #Recipe #Desserts #SummerDesserts #Peaches #FeedFeed #Foodstagram #NeverNotHungry
Follow on Instagram
  • Facebook
  • Twitter
  • Instagram
  • Pinterest

Copyright © 2025 Never Not Hungry on the Seasoned Pro Theme
Terms & Privacy Policy